Creating a Web App in ArcGIS Online
- Web Apps are created from Web Maps.
- The purpose of a Web App is to present the data created in a Web Map in a streamlined and focused platform viewable on any device or browser.
Creating a new Web App
- Navigate to the WebMap containing the data you would like to use in your Web App.
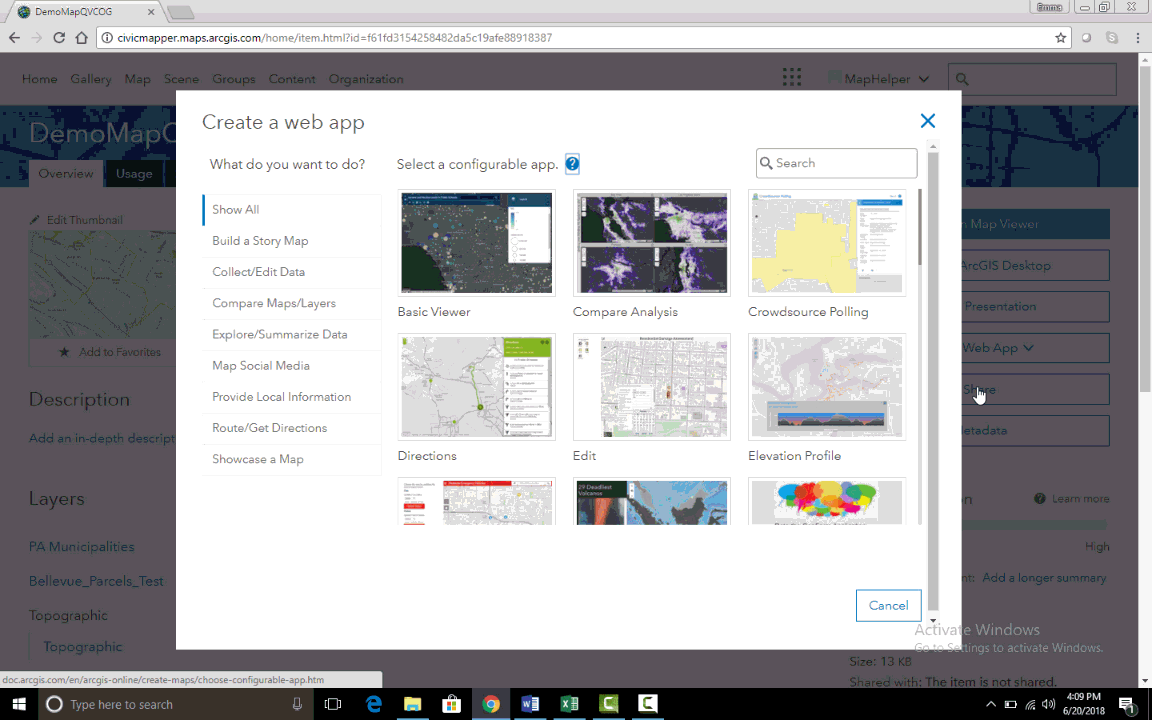
- Click on Create Web App.
- For beginners it is best to choose Using a Template.
- There are many Web App Templates to choose from. Browse and explore the options to find which is best suited to your needs.
- Once you have made your selection, click on that template and select CREATE WEB APP.
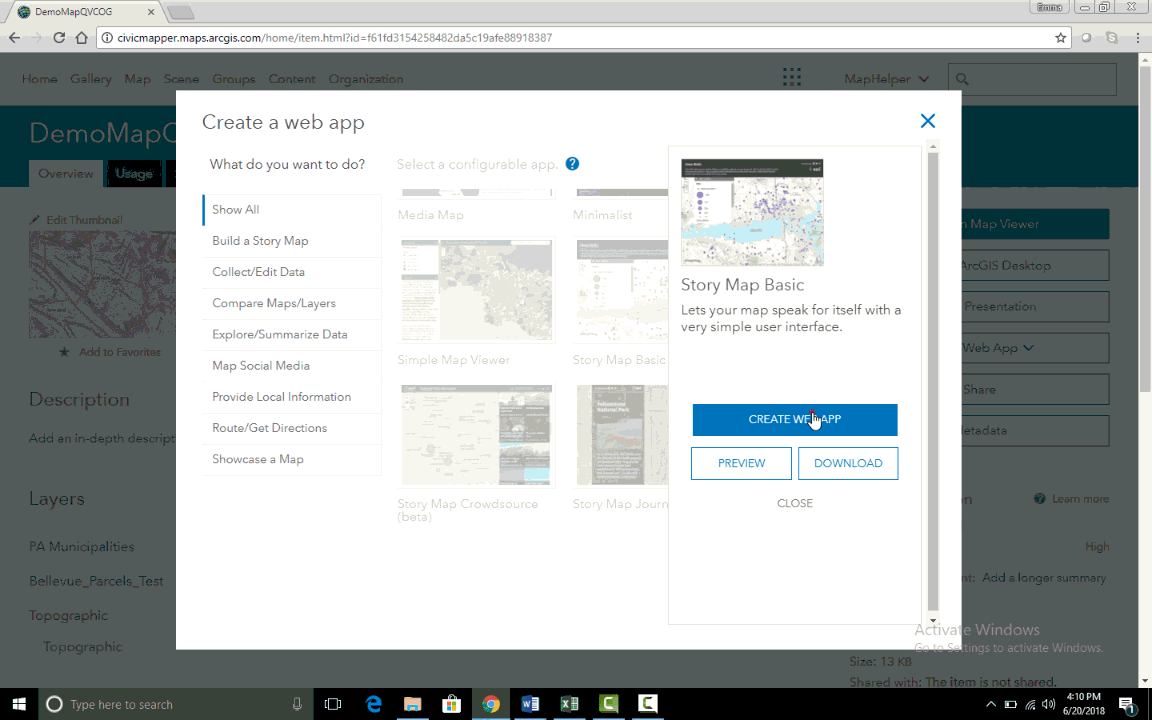
- Fill in the required fields.
- It is good practice to include “WebApp” in the name of your new Web App to differentiate the content from the WebMap used to create it.
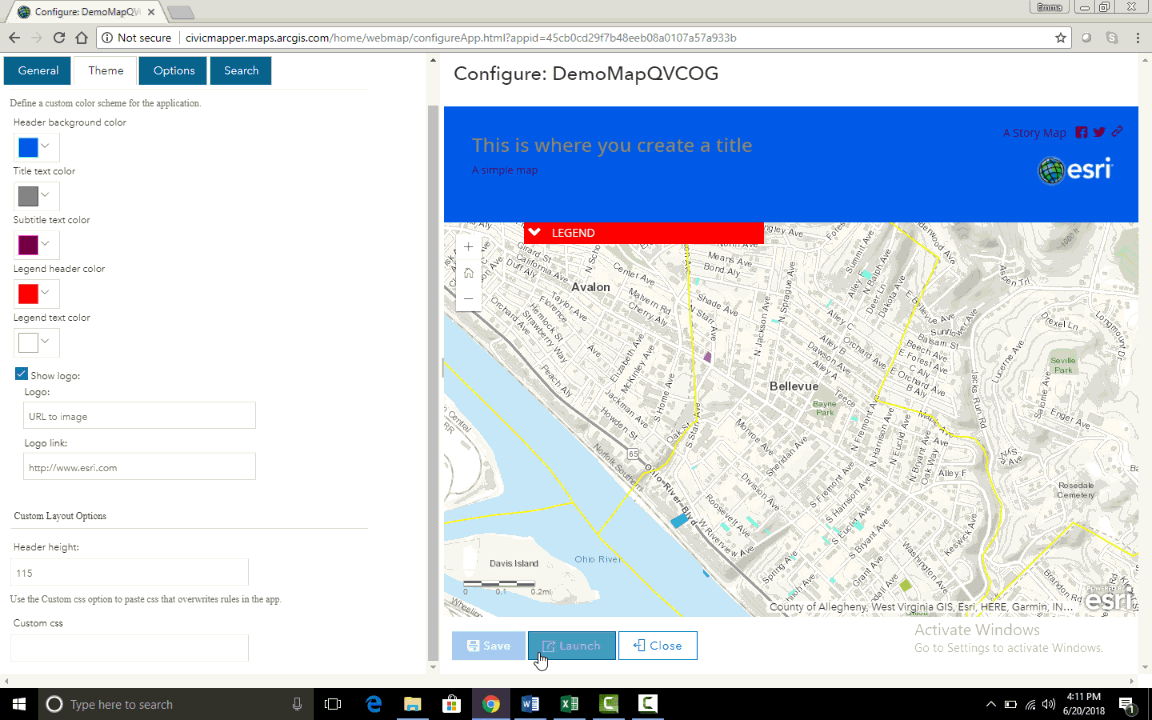
Customizing Your Web App
- Most Web App creation will involve filling and editing fields and choosing display options so that the Web App is customized to suit the user’s needs.
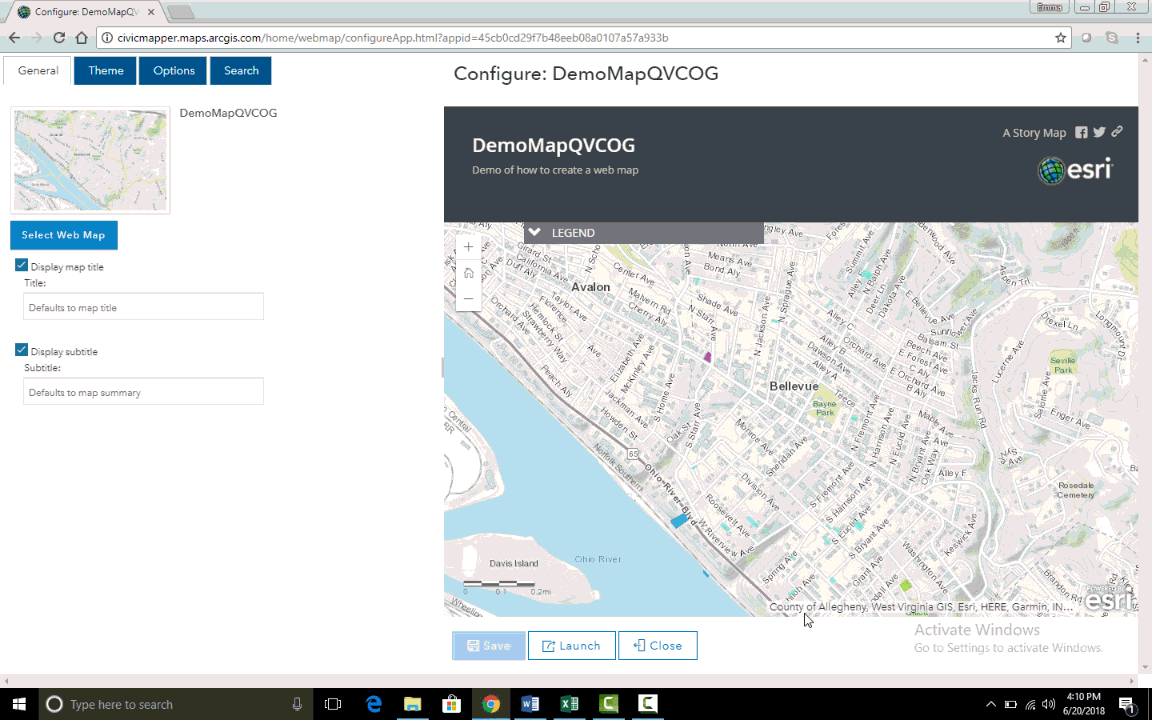
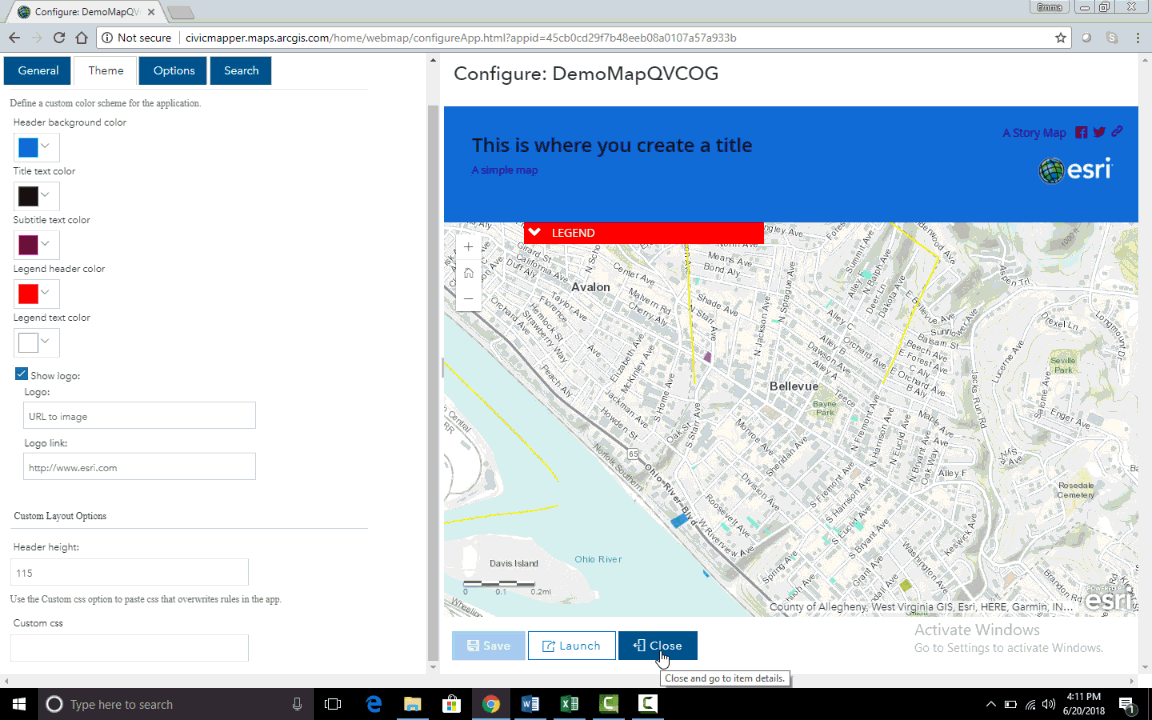
- Clicking Launch opens a new tab showing what the resulting App will look like.
- If anything is incorrect or incomplete, simply close the App display tab and edit the relevant fields.
- Once the app is finished, click Save to create a shareable Web App that will be available in your Content.
- Share the Web App so that the public or other groups and organizations can view your content.
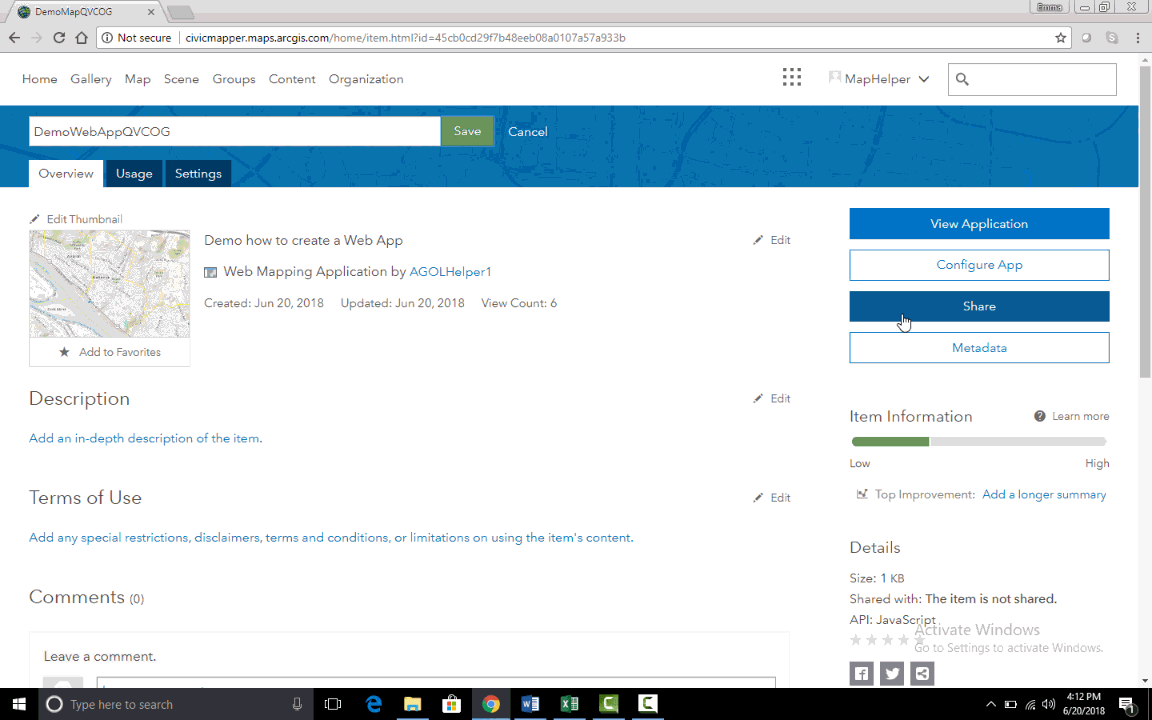
The App can be further edited at anytime.
For more detailed information on creating a Web App, please see ESRI’s Web App help pages.